
DE Zoomcamp Week1 Note(1.1 & 1.2)
1.1.1
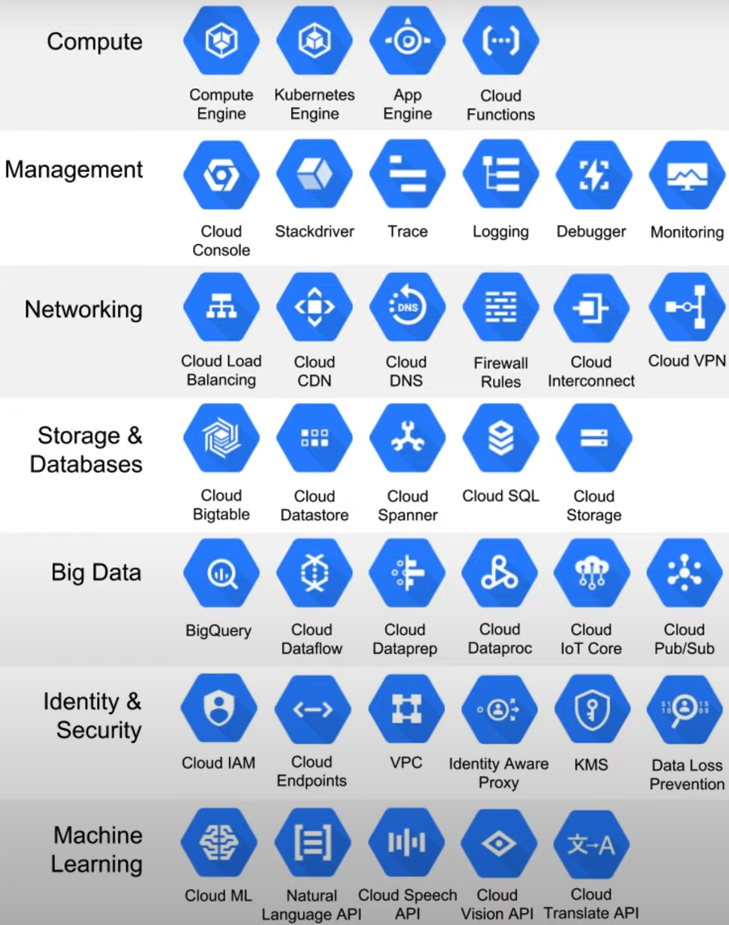
Google Cloud Platform
cloud computing services
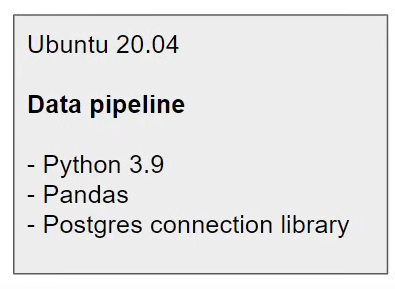
Data pipeline
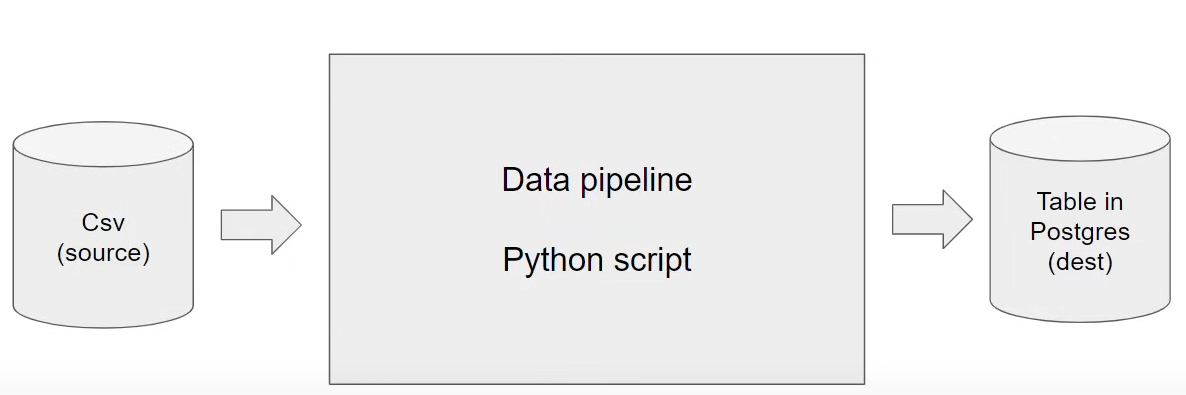
One Host computer (Windows/ Mac os/ Linux) can have multiple containers. Here is one example container.
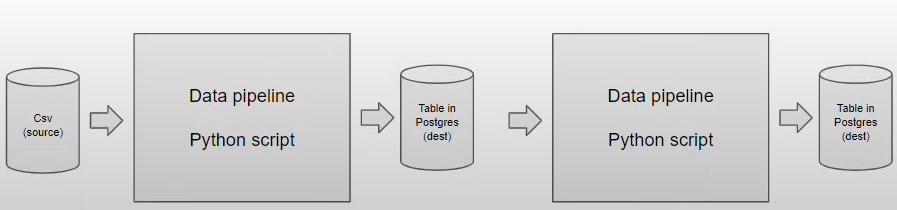
Also we could have Postgres on either Computer or Docker. Database will not connected on both environment.
Once we finish a docker container, we can run this on any Google cloud(Kubernetes) environment.
1.2..1
Why should we care about Docker?
- Reproducibility - 可重复性 * To use in different environments
- Local experiments
- Integration test(CI/CD) - 集成测试
- Running pipeline on the could(AWS Batch, Kubernetes jobs)
- Spark
- Serverless(AWS Lambda, Google functions)
Docker
Open Docker windows Dssktop
run
docker run hello-worldin git bash. It will go to docker hub to find an image called hello-world, download this image and run this image
Then we will input
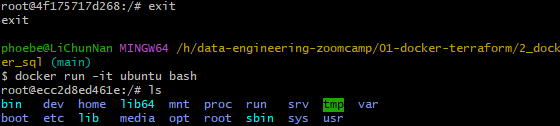
docker run -it ubuntu bash.run: we want to run this image-it: we want to do this in interactive mode,imeans interactive,tmeans terminalthis means we want to type something and the docker will react that
here may got an error message:

To solve it, have to follow the steps:*
Open git bash, in
~path, locate ~/.bashrc file. Cant usels -a ~to see whether this folder have .bashrc file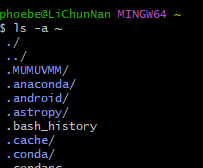
If not have .bashrc file, run
vim ~/.bashrcin this path. Then will create an empty file.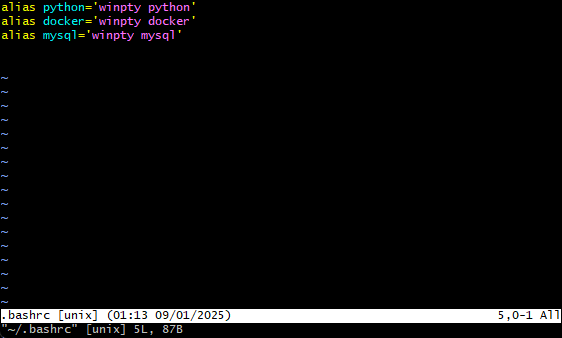
Once we get this file it was empty, we have press key
ito move into edit mode. Then type inalias docker='winpty docker'After that pressescexit edit mode. type:wqexit and save the file.run
source ~/.bashrcand reopen git bash. DONE!

ISOLATED It means even I use
rm -rf / --no-preserve-rootto remove everything It will reversed next time I reopen this docker container
1.2.2
Docker for python
Run python
docker run -it python:3.9
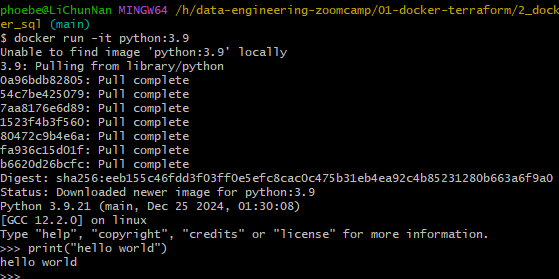
Download library
ctrl + dleave pythonrun
docker run -it --entrypoint-bash python:3.9run
pip install pandas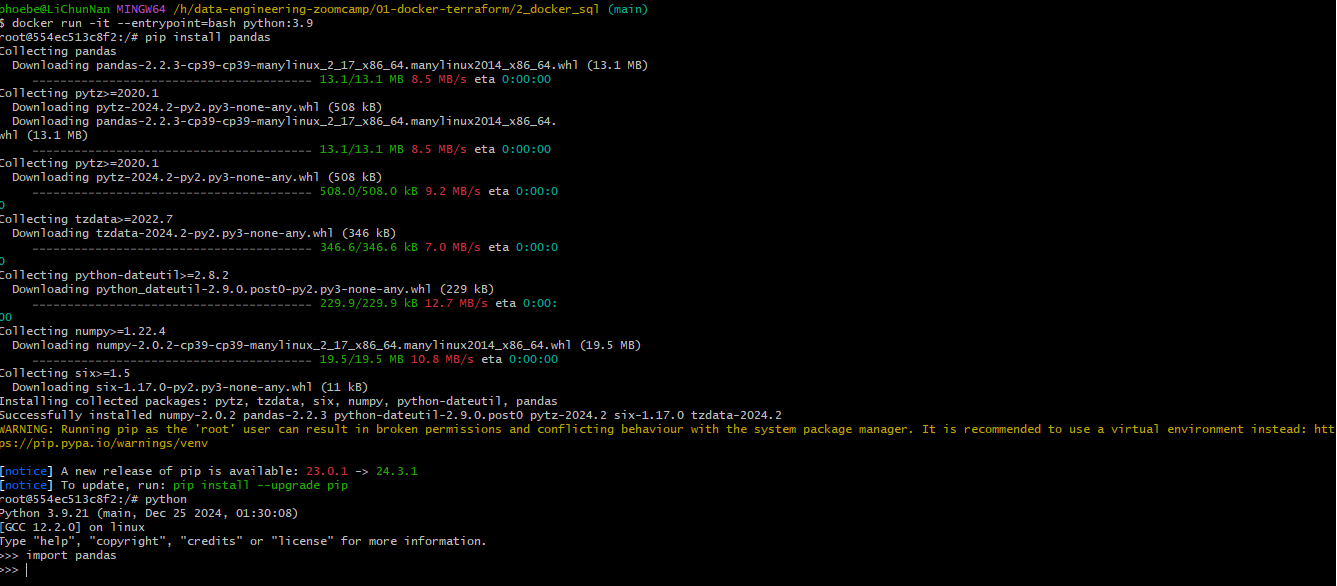
Things is once we leave this shell and use
docker run -it --entrypoint-bash python:3.9back in again, we still can not use pandas module. The reason is same as we userm -rf /.
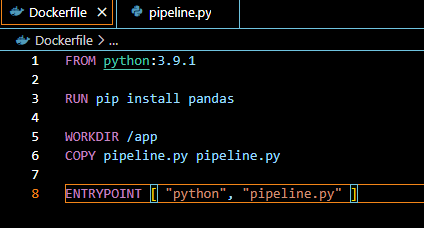
Dockerfile
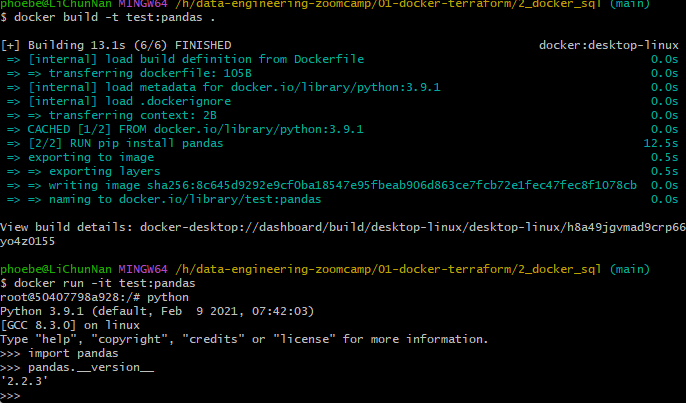
docker build -t
docker build means builds and image from dockerfile
. means we want docker to build an image this directory in the current directory.
It will look for the docker file and execute this docker file and we will create am image with test name
Create a new file called pipeline.py
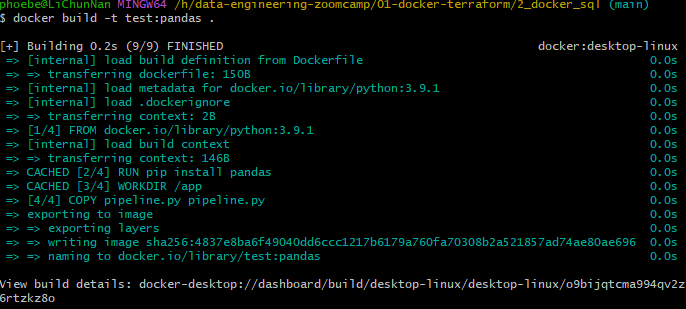
It actually works!
now debug pipeline.py. Rebuild Dockerfile.
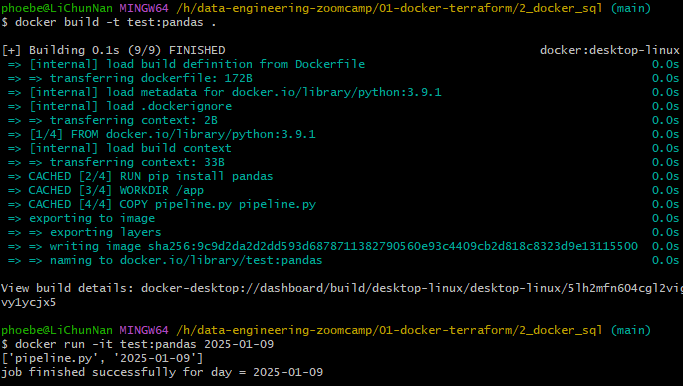
If we give more arguments to docker, those paramaters will be pass.
Postgres command line for Docker
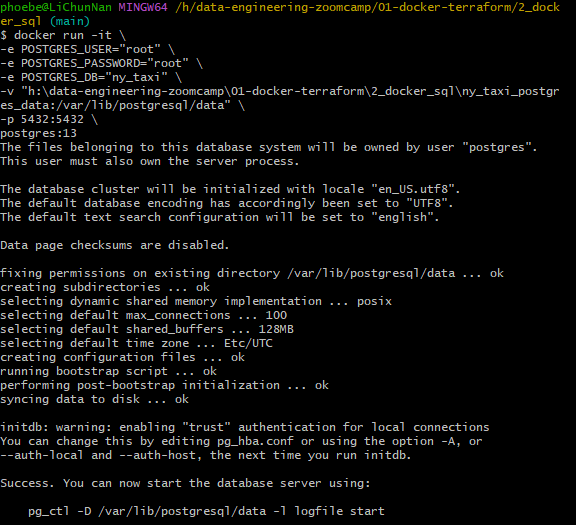
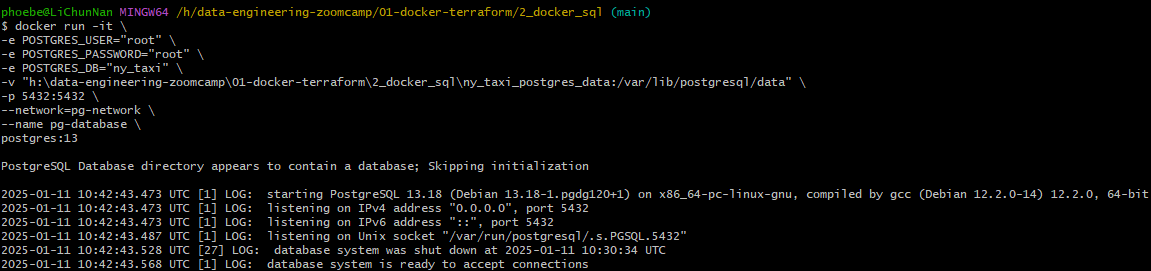
在 git bash 中执行代码,将其中的 h:\data-engineering-zoomcamp\01-docker-terraform\2_docker_sql\ny_taxi_postgres_data 替换为自己的存储路径。
1 | docker run -it \ |
给环境加双引号
windows 系统注意反斜线方向
空文件夹的问题也有遇到,但尝试评论中方案都未能解决,最后重装了 docker, 莫名其妙的好了

环境变量配置
-e POSTGRES_USER="root":设置 PostgreSQL 容器内的默认数据库用户为root。-e POSTGRES_PASSWORD="root":设置root用户的密码为root。-e POSTGRES_DB="ny_taxi":设置容器内创建的默认数据库名称为ny_taxi。
数据挂载
-v "h:\data-engineering-zoomcamp\01-docker-terraform\2_docker_sql\ny_taxi_postgres_data:/var/lib/postgresql/data":将主机(host)上的路径 h:\data-engineering-zoomcamp\01-docker-terraform\2_docker_sql\ny_taxi_postgres_data 挂载到容器内的 /var/lib/postgresql/data 目录。使 PostgreSQL 容器的数据储存在主机中,防删。
端口映射
-p 5432:5432:将容器内的 PostgreSQL 默认端口(5432)映射到主机的 5432 端口。这样就能从主机访问容器中的 PostgreSQL 数据库。
容器镜像
postgres:13:指定使用postgres镜像的版本 13 来启动容器。
pgcli
在 Powershell 中执行
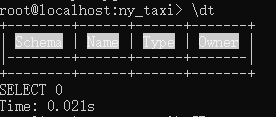
pgcli -h localhost -p 5432 -u root -d ny_taxi

使用 \dt 查询目前有的表
Running Jupyter Notebook
如何打开
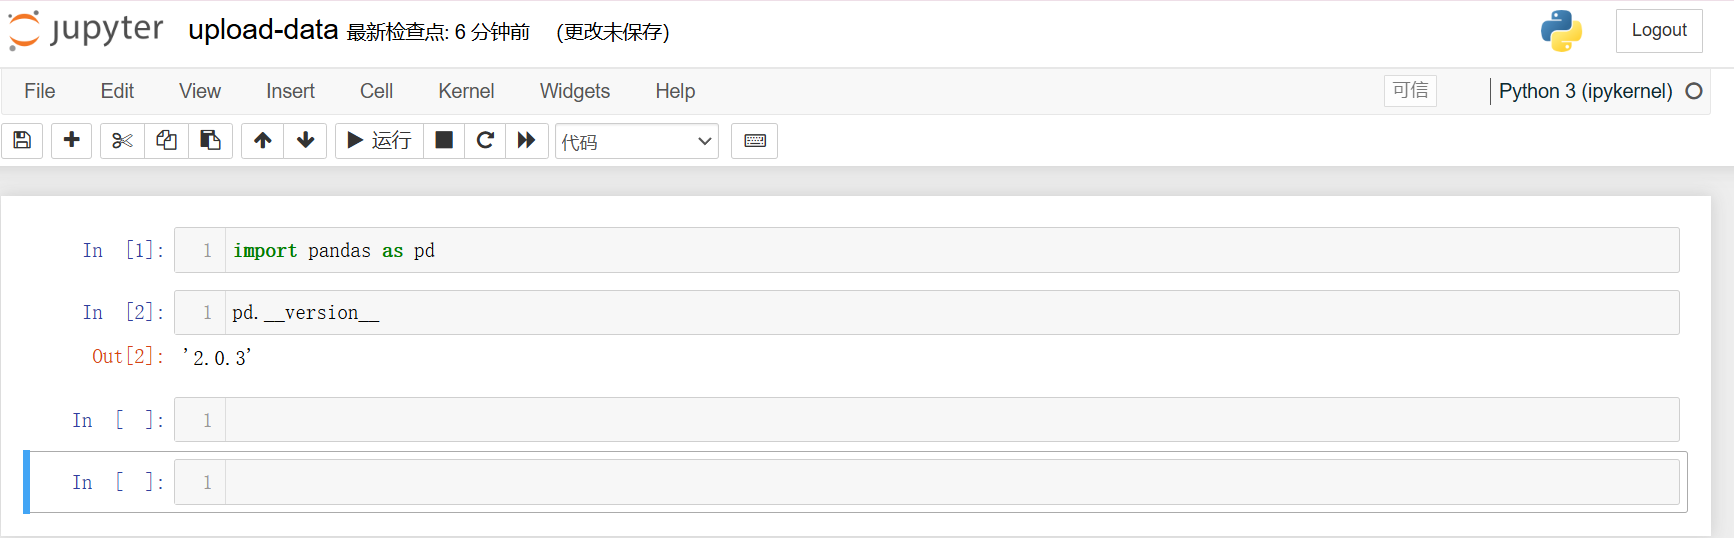
使用 git bash,输入
jupyter notebook然后会通过默认浏览器打开(蛮方便诶)
- 通过 anaconda 打开

使用 jupyter notebook
Taxi data
下载数据
wget
首先我下载了
wget.exe, 地址: https://eternallybored.org/misc/wget/将
wget.exe置于C:\Program Files\Git\mingw64\bin\目录下. 这里的下载目录根据自己安装 Git 时选择的目录来选择
下载数据
wget https://github.com/DataTalksClub/nyc-tlc-data/releases/download/yellow/yellow_tripdata_2021-01.csv.gz

解压
gzip -d yellow_tripdata_2021-01.csv.gz

查看数据
节选前 100 条数据集查看
head -n 100 yellow_tripdata_2021-01.csv > yellow_head.csv
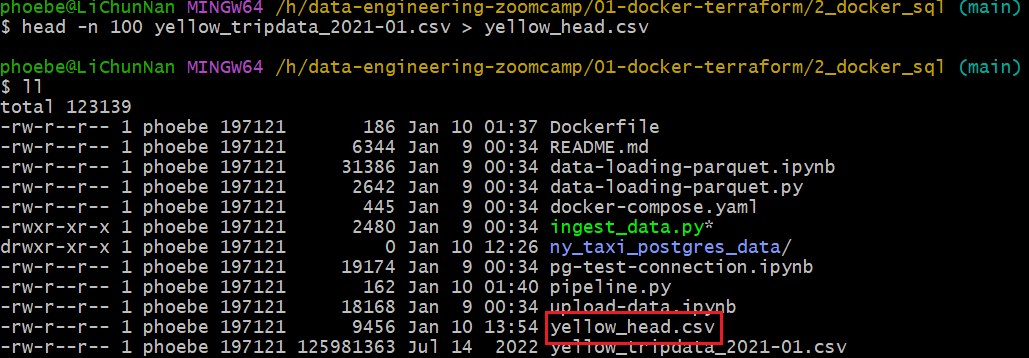
计算有多少行 wc -l yellow_tripdata_2021-01.csv

Reading csv with pandas
pd.read()
导入并查看前 100 行,导入使用 df = pd.read('yellow_tripdata_2021-01.csv') 要确保读取的 csv 和.ipynb 文件在一个路径下,否则要用绝对路径调用 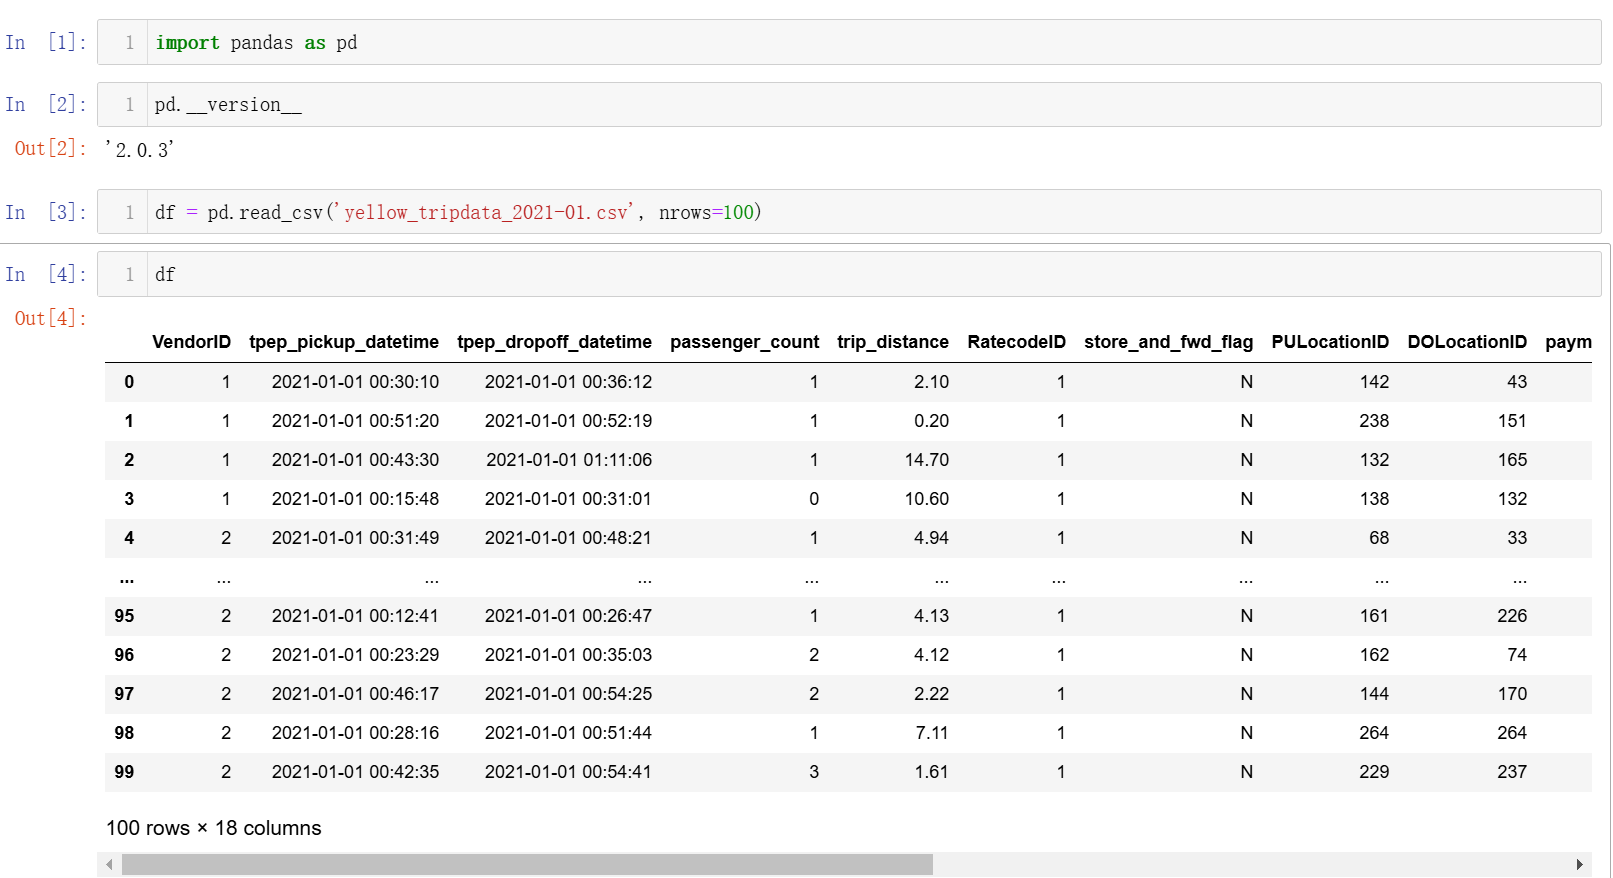
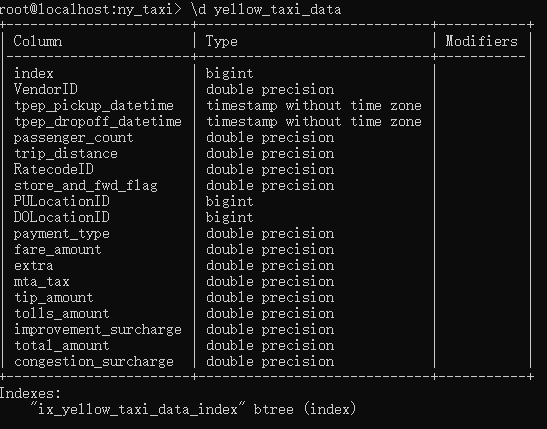
pd.io.sql.get_schema(df, name,con))
描述表格在 SQL 中的格式, 我们可以看到 tpep_pickup_datetime 在表中的额格式是 timestamp,所以用到了下面的 function 来转换 pandas 识别的格式  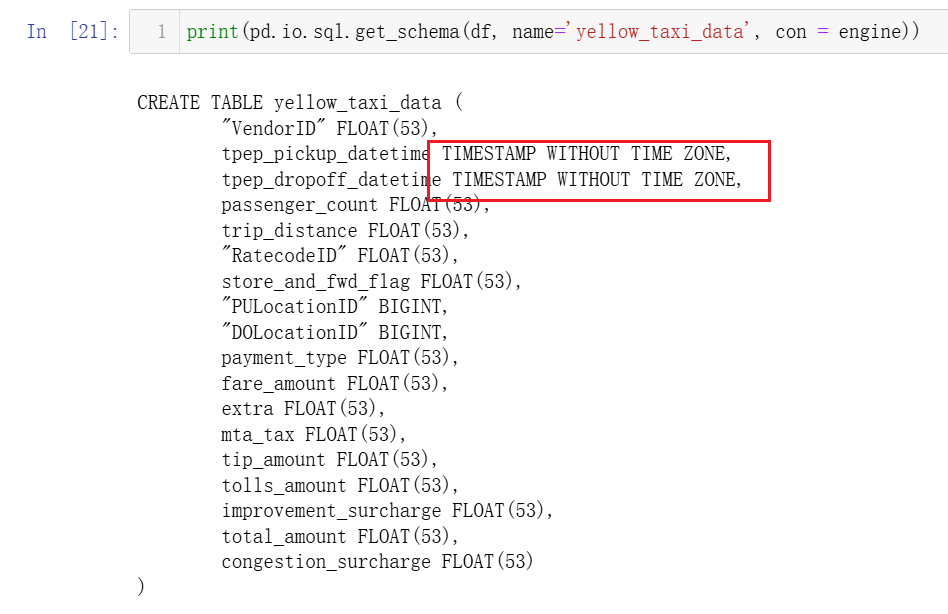 **
**pd.io.sql.get_schema(df, name='yellow_taxi_data', con=engine)**:
df:。df表示希望在数据库中创建的表的数据。name='yellow_taxi_data':为生成的 SQL 表指定表名为yellow_taxi_data。con=engine:数据库连接对象(engine),表明与 PostgreSQL 数据库的连接。SQLAlchemyengine被用来执行与数据库的交互。
**get_schema**:
- 根据传入的 DataFrame 的列名、数据类型等信息生成一个对应的 SQL
CREATE TABLE语句。 它不会执行 SQL,只是生成语句 ,可以将其输出并 手动执行或保存 到文件中。
添加了 con = engine 参数
pd.to_datetime()
使用 pd.to_datetime(df.tpep_pick_datetime) 来将格式转换为 datetime64 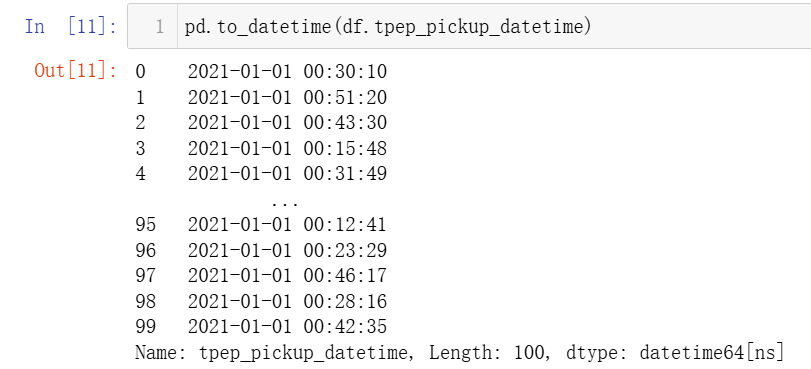
修改数据格式:
df.tpep_pickup_datetime = pd.to_datetime(df.tpep_pickup_datetime) df.tpep_dropoff_datetime = pd.to_datetime(df.tpep_dropoff_datetime)
create_engine()
engine = create_engine('postgresql://root:root@localhost:5432/ny_taxi')
create_engine 会创建一个 SQLAlchemy Engine 对象来表示与数据库的连接。通过这个 engine,可以执行 SQL 查询、读取数据、写入数据等操作
postgresql://
这是数据库的连接协议,告诉 SQLAlchemy 使用 PostgreSQL 数据库
root:root
这是数据库的用户名和密码,格式为 username:password。之前创建的用户名和密码都是 root
localhost
localhost 表示数据库在本地运行, 也就是 pgcli 执行 pgcli -h localhost -p 5432 -u root -d ny_taxi 时候使用的 -h 参数
5432
PostgreSQL 数据库的端口号
ny_taxi
要连接的数据库的名称
pd.read_csv(…, iterator = True, chunksize = 100000)
介绍下 df_iter = pd.read_csv('yellow_tripdata_2021-01.csv', iterator=True, chunksize=100000)
**iterator=True**:
- 告诉
pandas返回一个迭代器,按块读取文件而不是一次性加载整个 CSV 文件
**chunksize=100000**:
- 这个参数指定每次读取的行数。这里是每次读取 100,000 行数据。逐块读取 CSV 文件,直到文件读取完毕
next()
df = next(df_iter)
``next() 是 Python 的内置函数,用于从迭代器中获取下一个元素。每次调用时,它会返回.csv文件中的下一个数据块.df = next(df_iter)会将每次从迭代器取出的 100000 行数据赋值给df, 每次调用都会返回下一个数据块直到.csv`读取完毕
head()
df.head() 查看前 5 行数据,默认是 5,可以自行设置
df.to_sql()
df.head(n=0).to_sql(name='yellow_taxi_data', con=engine, if_exists='replace')
这里的作用就是添加表头
**df.head(n=0)**:
df.head()返回 DataFramedf的前 0 行数据. 如果想要不同数量的行,可以通过df.head(n)来指定,例如df.head(10)
**.to_sql()**:
to_sql()将 DataFrame 的数据保存到 SQL 数据库中。它会根据 DataFrame 的结构生成相应的INSERT语句,将数据插入到数据库中name='yellow_taxi_data':指定要将数据保存到数据库中的表名,这里是yellow_taxi_datacon=engine:指定数据库连接对象,这里使用的是SQLAlchemy创建的engine。它表示与 PostgreSQL 数据库的连接if_exists='replace':这个参数指定当表已经存在时的处理方式'replace'会删除现有的表并重新创建一个新的表'append'追加数据而不是替换表'fail'不做任何操作使用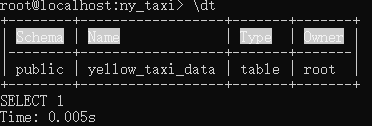
%time
%time df.to_sql(name='yellow_taxi_data', con=engine, if_exists='append')
查看将 yellow_taxi_data 添加到 engine 的时间,这里的 yellow_taxi_data 是我们之前切割过得 100000 行
遇到的问题
No module named ‘psycopg2’
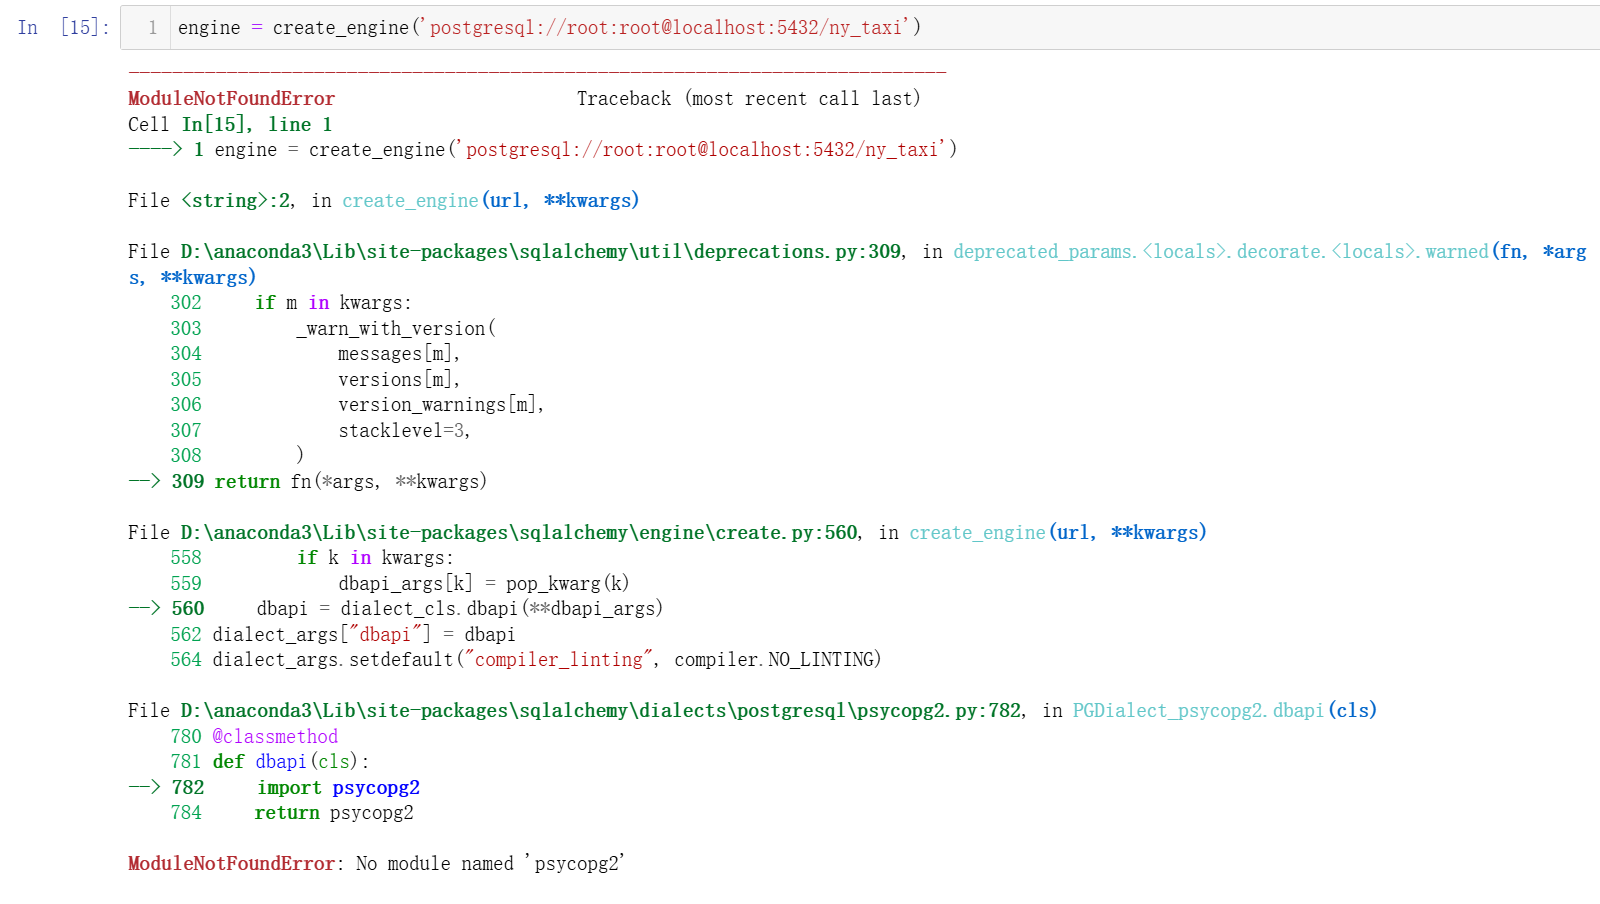
解决方法:pip install psycopg2 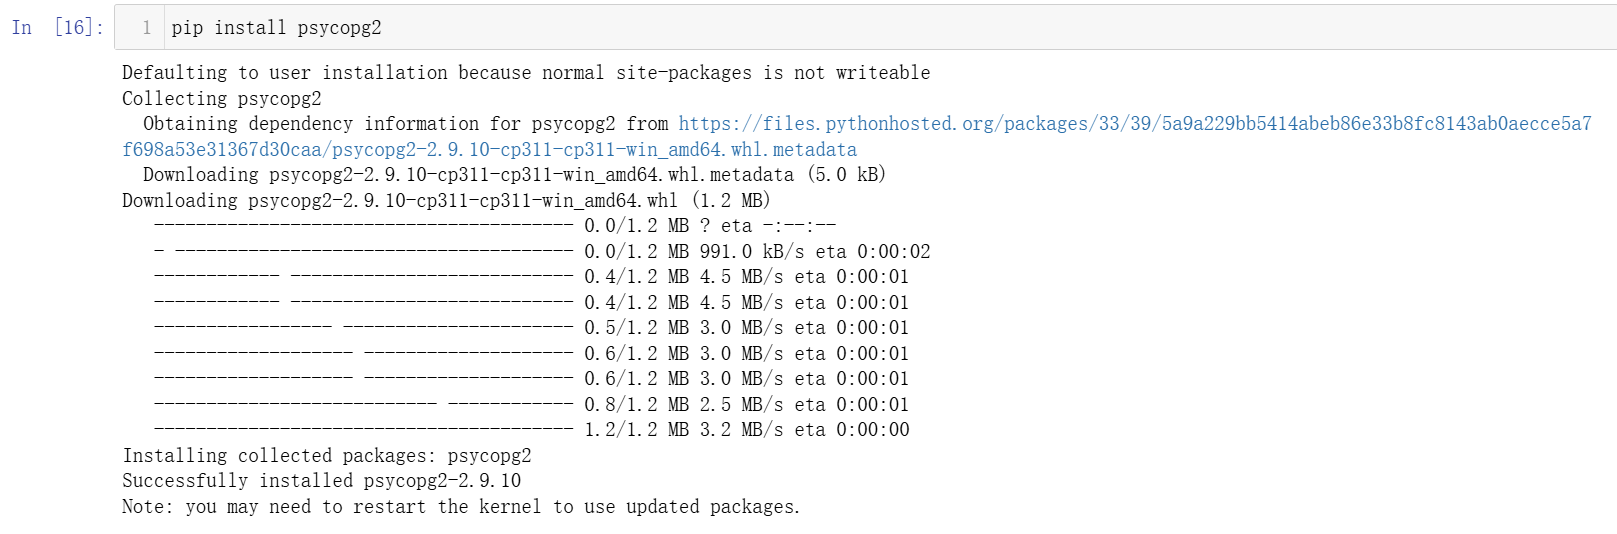
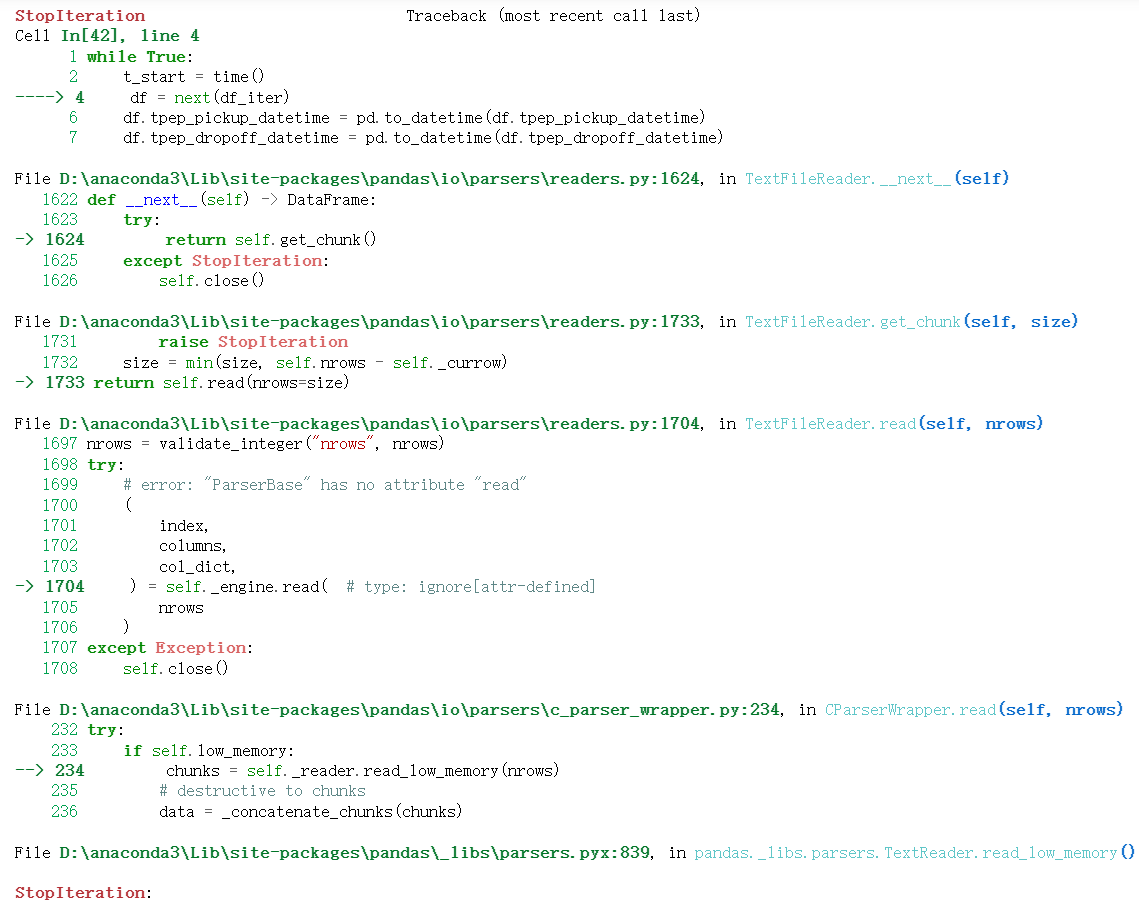
StopIteration:
只是说明迭代器 df = next(df_iter) 已经没有数据块可以继续读取了, 并非问题
1.2.3
创建网络将两个 container 放在一个网络下
docker network create pg-network

将 postgres: 13 这个 container 放入网络
将 dpage/pgadmin4 这个 container 放入网络
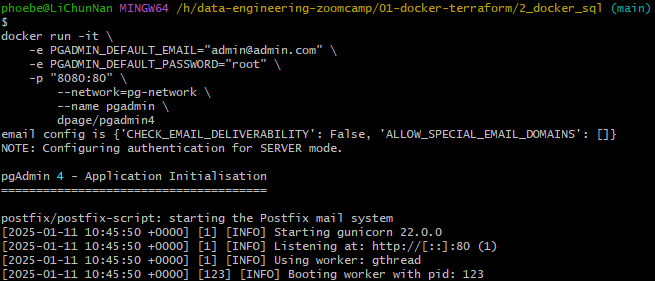
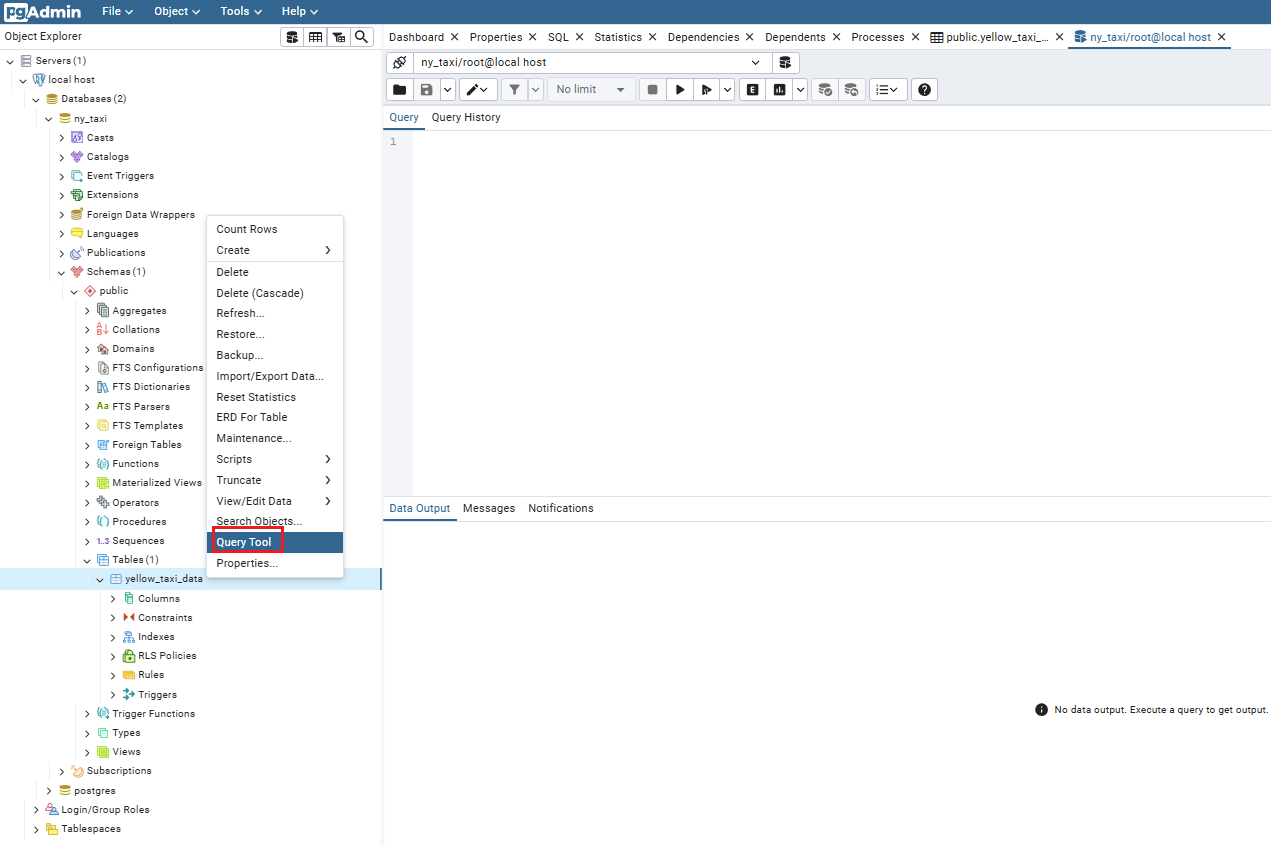
pgadmin 使用 query
1.2.4
将 .ipynb 文件转换成 .py 文件
jupyter nbconvert --to=script upload-data.ipynb
**
jupyter nbcconvert**是
Jupyter的工具,用于将notebook转换为其他格式--to=script指定转换目标为
.py, 这会将 Notebook 中的代码单元格提取并保存为 Python 脚本,同时将 Markdown 单元格和注释保留为脚本中的注释upload-data.ipynb
指定要转换的Jupyter Notebook文件名,这里是upload-data.ipynb
使用 parser.add_argument()
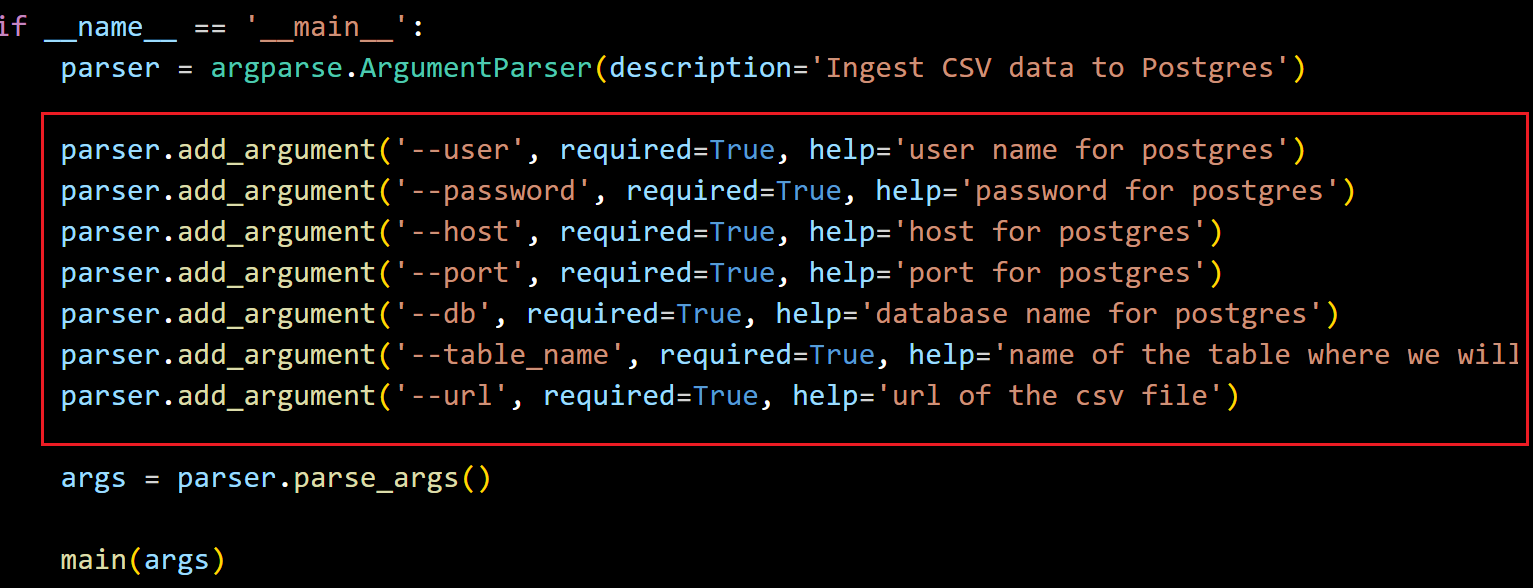
图中这些参数, 在后续的使用中都是要在执行这个 .py 的时候输入的参数
先设置临时环境变量,这是我们下载代码的 url
URL="https://github.com/DataTalksClub/nyc-tlc-data/releases/download/yellow/yellow_tripdata_2021-01.csv.gz"
这里执行这个 .py 的指令是:
1 | python ingest_data.py \ |
执行效果:

这里有个坑,就是视频中用的是下载完直接 .csv 格式,而目前我们有的是 .gz 格式,所以在代码中加了
1 | if url.endswith('.csv.gz'): |
这样如果传入的 url 是 https://example.com/data.csv.gz,那么 csv_name 会被设置为 output.csv.gz。如果传入的 url 是 https://example.com/data.csv,那么 csv_name 会被设置为 output.csv
后续 pandas 会根据文件扩展名来判断如何读取文件
解释下 Dockerfile
1 | FROM python:3.9.1 |
RUN pip install pandas sqlalchemy psycopg2
基于我们在 python 文件中需要使用 sqlalchemy 和 psycopg2 这两个库, 所以需要在这里下载 dependency
构建 Dockerfile 并执行
在 Dockerfile 所在的目录下执行
docker build -t taxi_ingest:v001 .
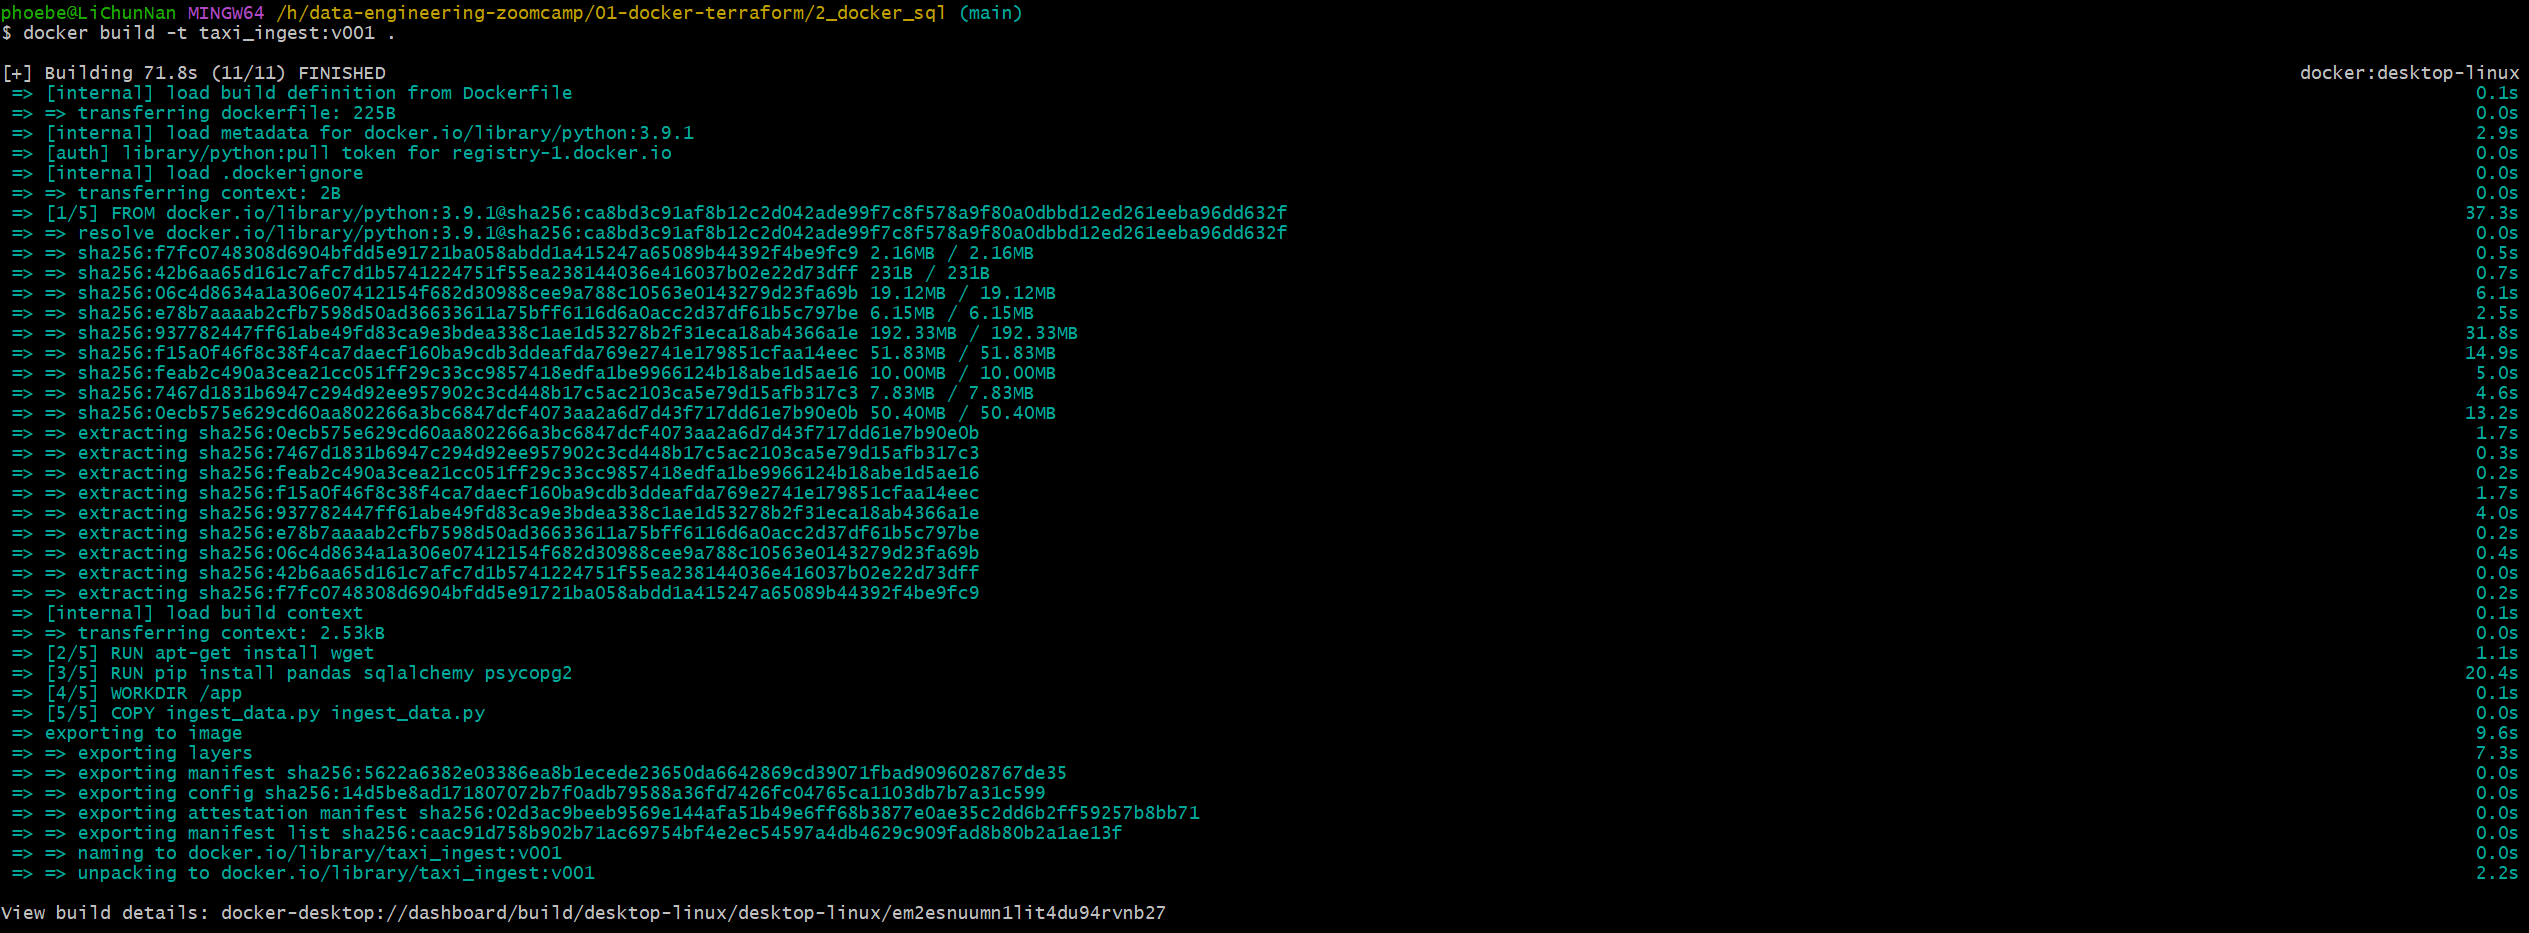
构建完成后执行
1 |
|
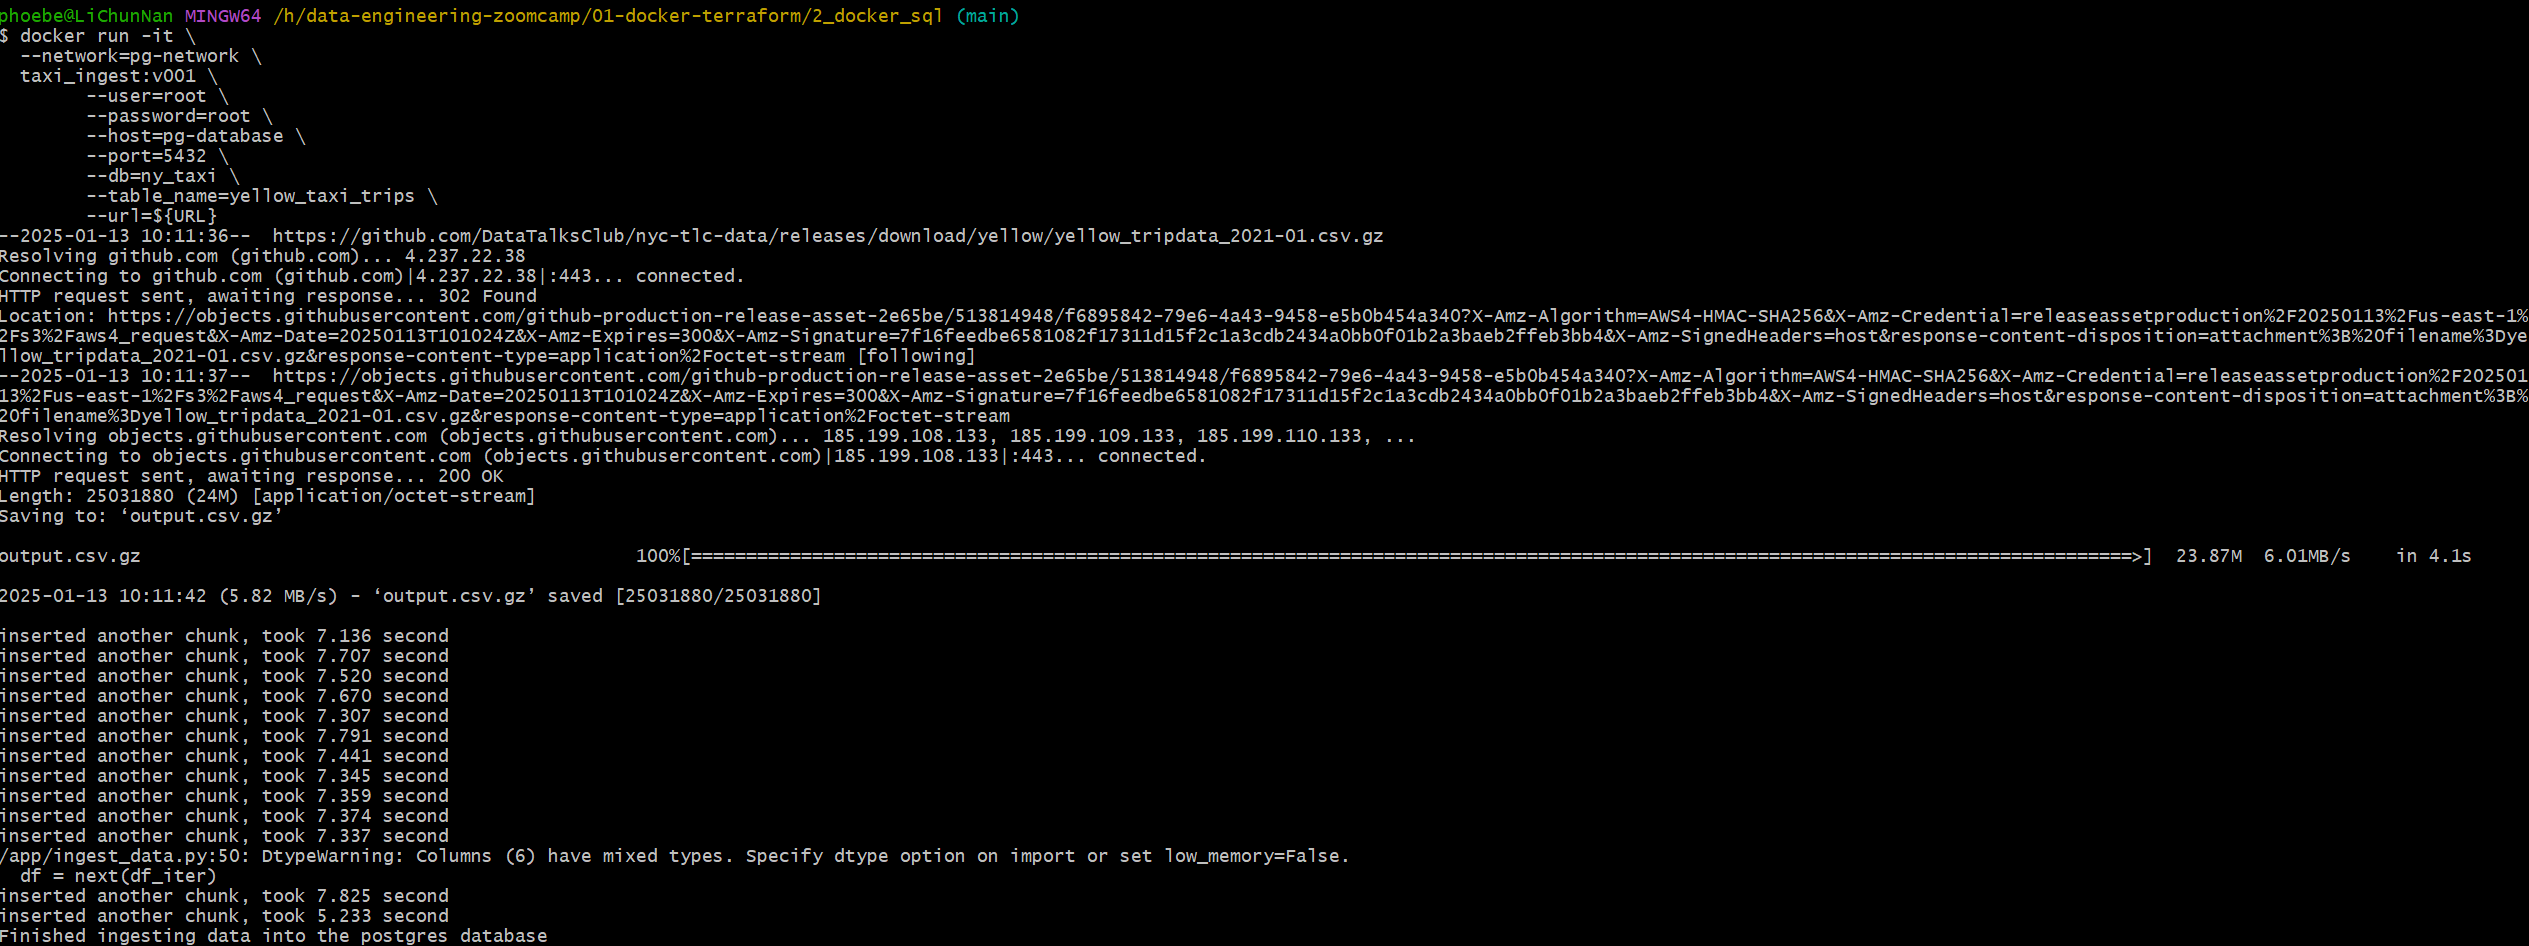
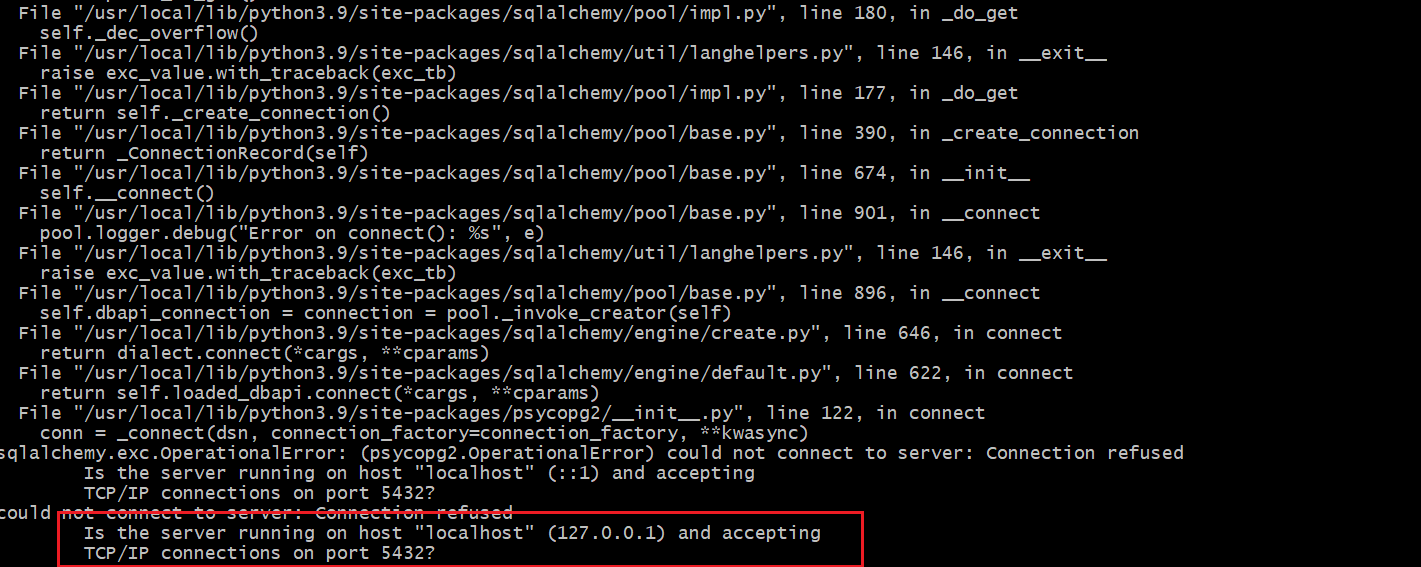
此处有坑不要根据视频来填写
--host=localhost \会产生报错psycopg2.OperationalError: could not connect to server: Connection refused Is the server running on host "localhost" (127.0.0.1) and accepting TCP/IP connections on port 5432?
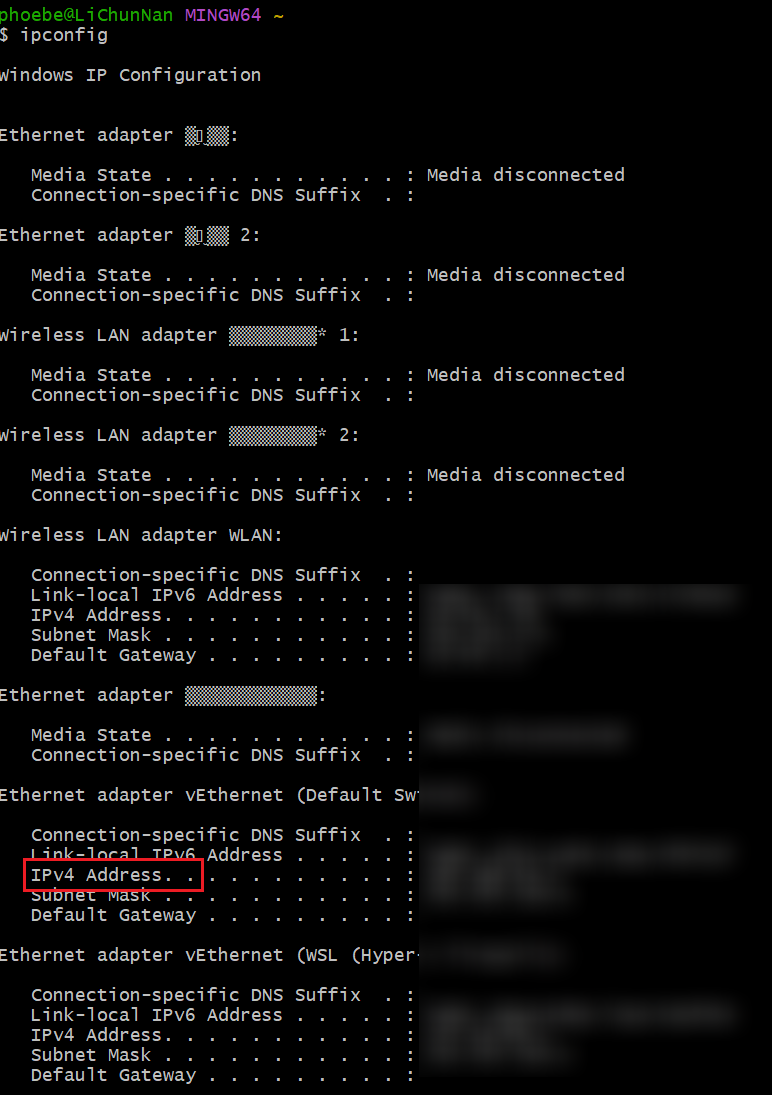
HTTP server + ipconfig
git bash 中输入 python -m httpm.server

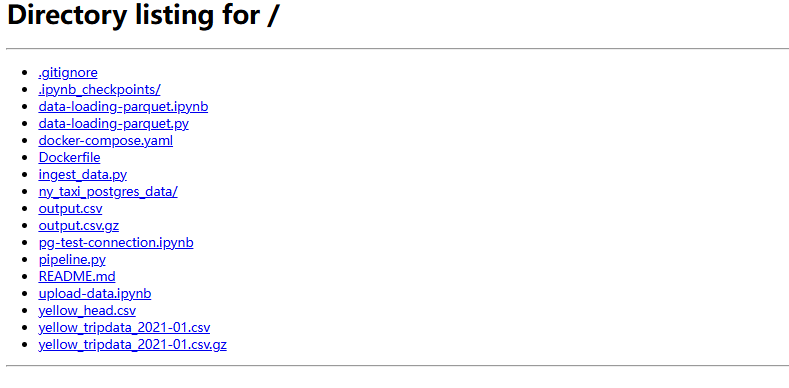
使用 ipconfig 查询地址
之后可以将本地的这个 .csv 的 URL 更新为环境变量中的 URL 值, 即
URL="http://192.168.64.1:8000/yellow_tripdata_2021-01.csv.gz"
使用之前同样的指令,这样下载数据会变快
1.2.5
Docker Compose yaml file
目的 :无需执行之前使用的多个命令行,例如创建网络,添加网络 etc.
1 | services: |
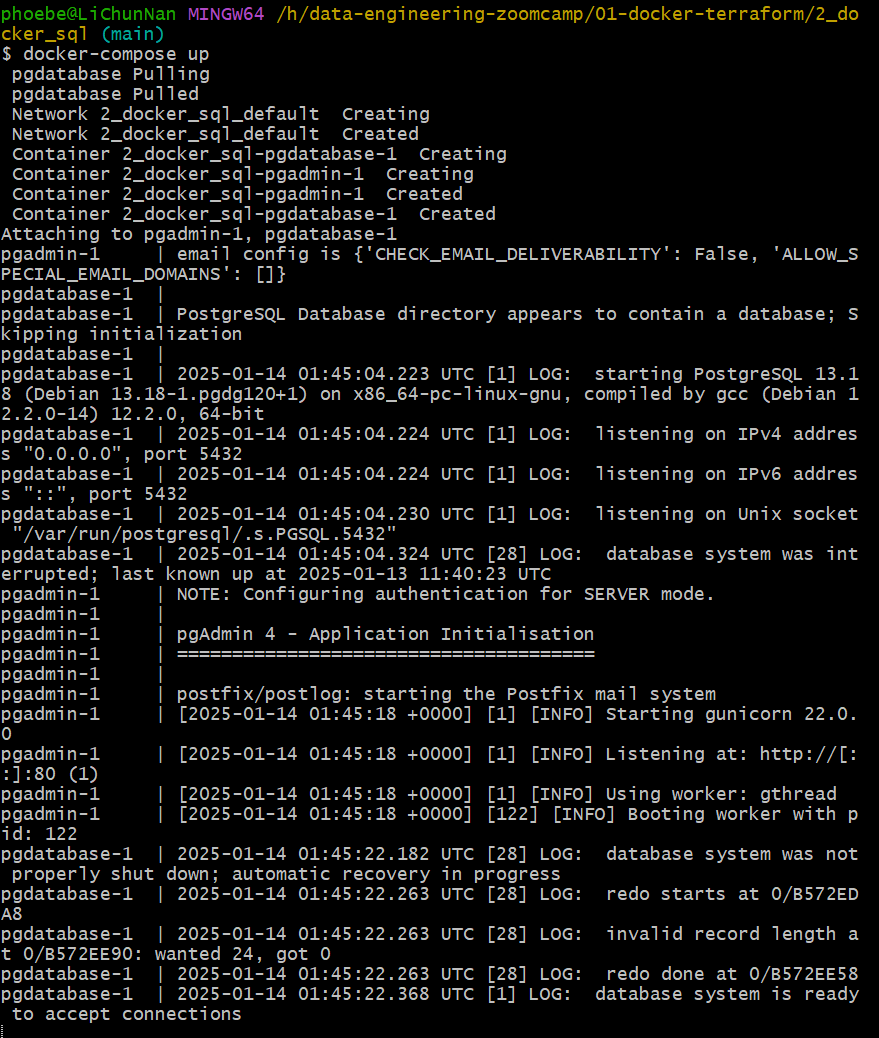
之后执行 docker-compose up
退出的时候 ctrl + C
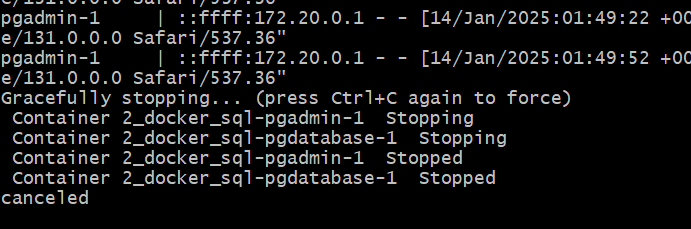
输入 docker-compose up -d 启动

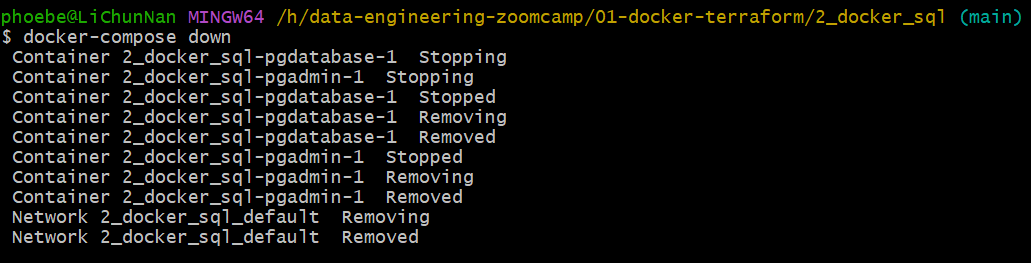
关闭使用 docker-compose down
1.2.6
下载 zone 数据
!wget https://d37ci6vzurychx.cloudfront.net/misc/taxi_zone_lookup.csv
由于 .csv 的地址发生改变,所以需要用这个链接进行下载
SQL 查询
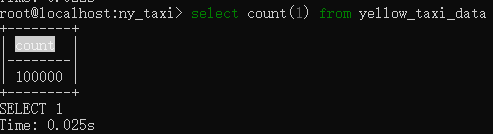
查看全部数据
1 | select |
查看 100 条数据
1 | select |
用实际名称代替区域标号
使用 where 中的关键词进行关联
1 | select |
还可以用
1 | select |
只查看部分列
1 | select |
1 | select |
检查是否有 NULL 值
1 | select |
检查 yellow_taxi_trips 表中是否有 DOLocationID 不在 zones 表中
1 | select |
删除某个数据
1 | delete from zones where "LocationID" = 142; |
LEFT JOIN
这里由于之前删除了 LocationID=142 的数据,所以我想让 ID=142 的数据显示 unknown
1 | select |
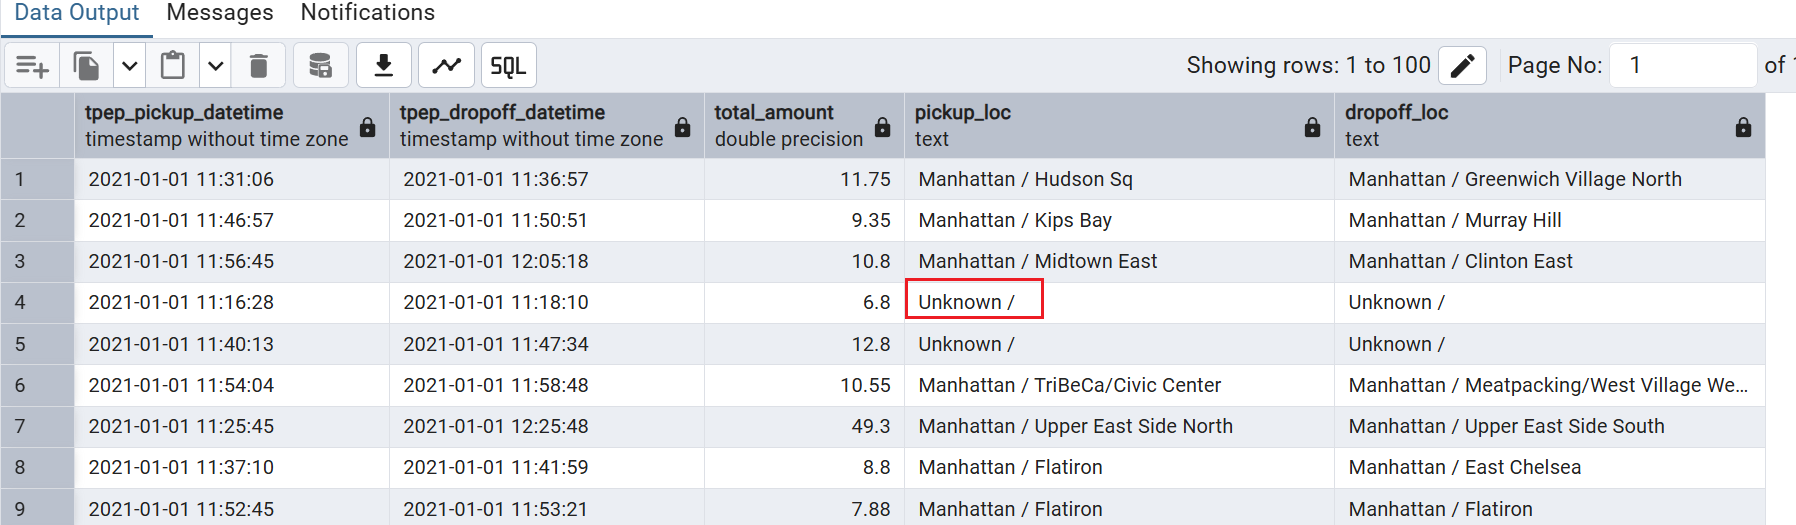
- 同理,
RIGHT JOIN就是 zones 表中有记录,但是yellow_taxi_trips这个表里没有记录,那么我们可以让这个记录显示unknown -
OUTER JOIN像是LEFT JOIN和RIGHT JOIN的组合,左边没有或者右边没有记录都会显示Unknown
GROUP BY
进行计数,这里是按照日期计数
1 | select |
ORDER BY
1 | select |
DESC from highest to lowest
ASC from lowest to highest
1 | select |